Tuesday 30 April 2013

Jane Tomlinson Peak District charity walk

Sunday 28th if April was the date of the 2013 Jane Tomlinson Peak District Walk For All event. The event support multiple charities including ones for children, cancer, diabetes and because of the location the Edale Mountain Rescue Team who were in standby supporting the event.

I only came across the event by chance after seeing an article on outdoorsmagic a few days before the event interviewing the late Jane Tomlinson's husband who continues the great work she started. All profit raised by the event goes to the supported charities so I figured why not! I most likely would have been out in the Peaks over the weekend anyway so I may as well do it for a good cause! Unfortunately I didn't have a chance to do any fundraising due to the short timescale but I'll have to rectify that next year. After pestering my usual walking mate Greg to sign up also I was good to go. Naturally being the super-fit athlete I am (good job you can't see my eyes rolling right now) I signed up for the longest 25 mile 'Dambuster' slog. Also available were 14 and 6 miles version for all abilities. Initially after reading the name I feared a lot of the miles would be following the Derwent and Ladybower reservoirs on the road like tracks circumnavigating them, but I needn't have worried. The route was superb and took in quite a hefty chunk of the Peak Districts' best bits in one sizeable route that turned out according to strava to be nearer 27.5 miles (but no pain no gain right?).

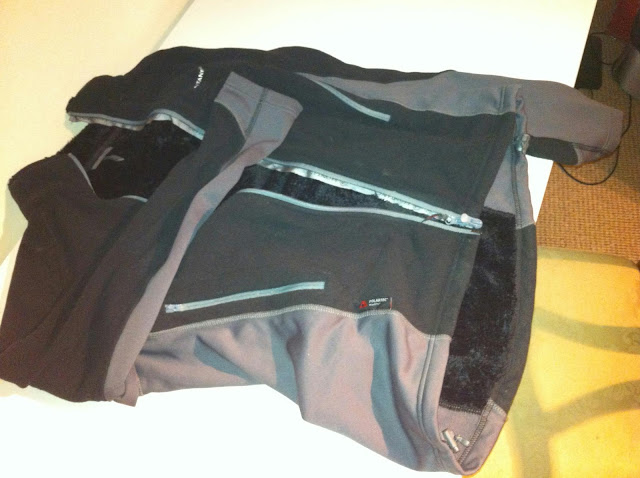
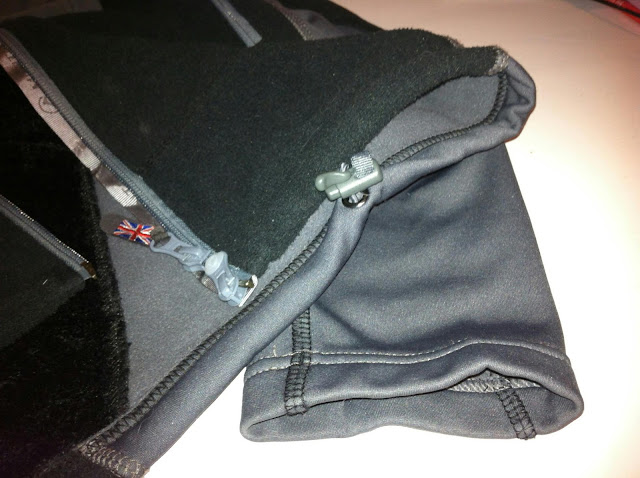
Due to the distance I decided on a light as possible kit list but with everything from a frosty start, pretty warm sun and ending in rain it was pretty hard to cut corners. I won't go into any specifics in this post as I'll review all the kit used in depth another time apart from I've already reviewed obviously. For footwear I thought of using my Meindl Burma's but they're heavy and I'd never trekked this far in them so was a little dubious as they're broken in but not quite at that stage where you'll trust them for the distance to be comfy. I use a pair of Altberg Sneeker boots for military work and they've been used extensively and on slogs as long as this before with no problems. They aren't the waterproof version but are more than capable to fend off heavy rain and quick dunkings and feel like trainers to wear and weigh hardly any more! Needless to say I didn't even feel the start of a hotspot throughout! For trousers it had to be Montane's Terra pants. The vents and DWR coating were both invaluable throughout. Again from Montane the Medusa pack was the pack of choice. It was just the right size to fit the bare essentials of food, water, first aid, compeed etc without too much excess space. For warmth I took my Rab Microlight Alpine and for rain my Rab Volt, both chosen for pack size and minimal weight without scrimping on features. For on the go Helly Hansens classic lifa Tshirt was a no brainer but Rab's Boreas was the perfect super light softshell for 90% of the day.

Enough about kit and onto the day itself! Due to the length of the day and the 11 hour time cut off an early start was to be expected. Registration was at the Hope College at 6:30-7:30 with the start at 7:30. Leaving the house at 6:00 after 3 hours sleep from having to borrow my brothers car after he finished work at a pub didn't help matters due to my trusty steed being due for repairs and limping around horribly! The event seemed to attract quite a wide variety of entrants of all ages and abilities all looking for a socials challenge. I'd guess there must have been at least 200 participants. I may be wildly off but the starting crowd was pretty hefty!

After a quick brief we were off, heading towards Win Hill and straight into the first sizeable climb of the day within 10 minutes. The started to spread the crowd out a little once the initial rush had spread out and the fell runners have sped gazelle like off into the distance. The weather was perfect when we summited Win Hill with clear views over Ladbybower reservoir and along Castletons famous ridge with Mam Tor looking rather impressive in the distance with the early morning light. Once this first obstacle was out the way everyone seemed to find their second wind after a rather long warm up climb (isn't the first always the worst?) and we gradually dropped down into Edale for the first checkpoint around the 7ish mile mark. Once we'd arrived here at what I'd guess to be around the middle of the pack we had a short but welcome 5 minutes rest after checking into the village hall which was being used as the checkpoint post. Water bottles were available to resupply for free and you had the choice to switch over to the shorter 14 mile loop which this was the half way point for.

Feeling fresher after a quick refuel we carried on along the Pennine Way start from the centre of Edale, heading towards Jacobs Ladder which was most definitely the hardest climb of the day and generally a pretty beasty slog regardless of your reasons/method of ascent!

At the top of Jacobs Ladder which was the 13 mile mark we had another quick breather to let the feeling come back to our legs! We'd kept up a pretty reasonable 3mph so far which was what I was aiming for throughout the day. Once suitably alive again we cracked on along the Pennine Way until we reached Hayfield's campsite for the next checkpoint. The last couple of miles up to this point were a welcome relief after Jacobs Ladder to make up some time on the flat ground, and to roll downhill to Hayfield without having gravity do its best to annoy us!

By the second checkpoint I think a lot of people were starting to feel the miles after keeping up a decent pace for about 5 hours! Along a stone wall just next to the check in point a row of what must have been 50 mildly weary looking hikers were sat recuperating for the second half of the trek. I noticed on the map we were at what was marked about 13.5 miles but strava said we'd done nearly 16, which was a little disheartening as I presumed the second half would bring the mileage to nearly 30 miles! My legs were feeling ok, but my head was starting to feel the miles and morale took a little drop over the next hour. With long slogs like this their is always a point where your starting to tire but begin to stop enjoying yourself I find. Theirs a lot to be said for the challenge being just as tough mentally as it is physically and I find they especially true. While building strong legs and lungs in the gym is one think, nothing equates to spending hours trudging along, especially when you feel like your waffled on about everything your brain contains! After leaving Hayfield we climbed up onto the Pennine Bridleway which runs roughly parallel to the road heading through Hayfield then bears off towards Rushops Edge. It's a long slog that feels like it takes hours and being gradually uphill the majority of the way (or it seems to anyway) it starts to take its toll. I think this slog was where I had my morale stoop and Greg started having issues with an old knee injury purely from the hours spent stomping along. Once we reached closer to Rushops Edge I knew the end was reasonably close and we'd broke the back of the trek with roughly 3/4's done at least. We knew the final checkpoint was only a quick hop to the car park behind the top of Mam Tor and the shortest segment was beyond that. I'd ridden Rushops Edge on my mountain bike before but never the Pennine Bridleway so made a mental note to make an off road ride from Castleton to home in Glossop one day soon on what looked to be some awesome, really fast and flowing bridleway!

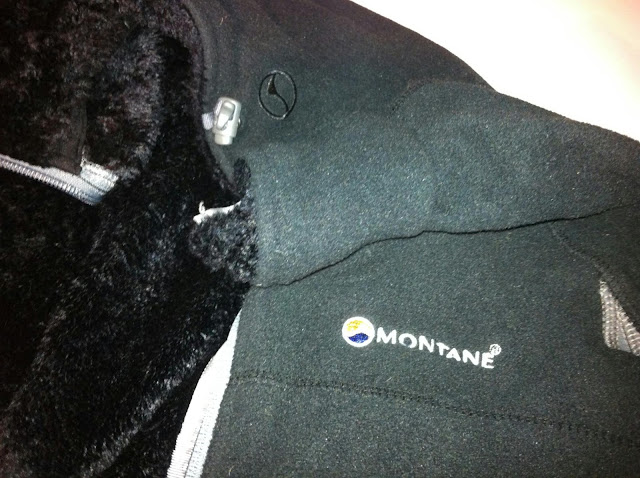
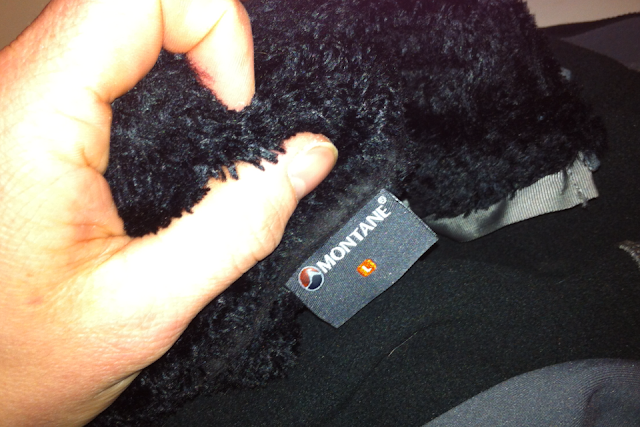
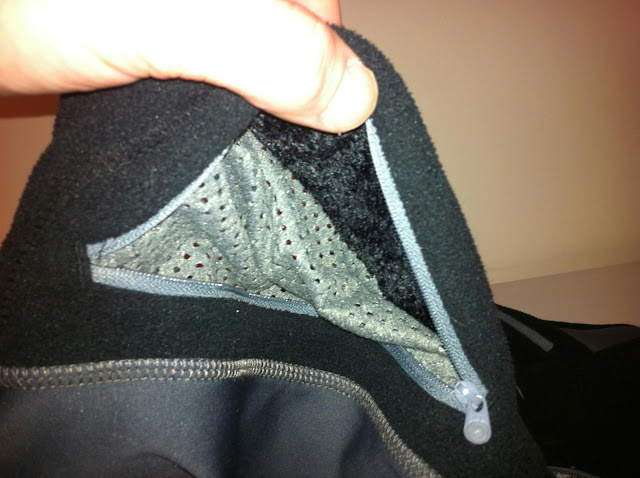
We'd made good time on the 3rd section even though we were a bit grumpy and sore by know, especially with injuries flaring up so the checkpoint was a welcome stop. Having a slightly shorter break than the other walkers put us ahead of a good few, who had a longer break at checkpoint 2 so we did the same at checkpoint 3. Feeling a renewed sense of energy knowing we had the final, relatively short ridge to finish we set off. I knew we'd done all the proper climbs so there was nothing too taxing to slow us down. Typically when your nearing the end and spirits rise the weather does its best to fix that! The weather had been great all day, with just clouds overhead and the odd sunny spell. I was comfy in a Tshirt and y Boreas without feeling cold or too hot throughout upto this point. In a typically British way though it started to drizzle properly although it had been threatening to do so for the last hour. We were close to the finish and the rain was only very light so I valiantly stuck with the Boreas, thinking I'll keep my shell to stick on at the end as the rain had only been for a few minutes at a time up until now. Naturally I was wrong. Drizzle became rain, hands went numb and I got wet! Being stubborn I stuck with the Boreas and to its credit I soon felt warm, although wet, creating a wetsuit type effect. With the hood up the top did a superb job of keeping the feeling of the rain at bay and somehow I stayed surprisingly comfortable! My hands even regained feeling too! Greg on the other hand had his brand spanking new Montane Sabretooth softshell which kept him surprisingly dry and comfy all day. Must say, I'm mildly tempted by one in the future!

Back onto the slog though! After hopping over Mam Tor it became apparent the view was non existent. We could see the shape of the ridge towards Lose Hill faintly looming in the distance which spurred us on. By this point Greg's knee was starting to give him some proper grief but he carried on regardless, knowing the end was near and soon to be a downhill stroll into the village. Once Lose Hill was cleared we had an easy mile and and half into Hope to the finish line. The rain was easing by now the Greg's knee wasn't and had become much more of a problem as the downhill was seemingly much more painful than the ups...typically when all we had was down to go! With 95% done we slowed down a little and hopped rather clumsily on dead legs over the stiles towards Hope and the finish line.

At the finish we were clapped over the line and handed 'finisher' medals which looked pretty smart and were a nice keepsake. Glad to be done we changed into dry clothes and hobbled to my car, feeling the miles quite strongly by this point!

Overall though it was a brilliant event and something I hope to do next year with a faster time than the 10 hours I completed it in and most definitely raising some money for the cause! For other events around the country go look on www.forallevents.co.uk


Sunday 17 March 2013

Rab Vapour-Rise Lite Jacket Review

I've been using Rab's Vapour-Rise Lite jacket for the last 4 months over winter and it's become my automatic go to jacket for cooler, active use.  I picked it up on a whim from Rab's factory shop purely because it was stupidly cheap and I'm rather darn glad I did!  Price wise it was silly cheap.  Cheap to the point where the girl on the till was sure it was mislabelled but gave it me anyway.  Would I pay the full £100 RRP? Absolutely!  I don't think I've done any outdoor activities without it since I bought it.  At times I do wish I'd got the Alpine hooded version but that wasn't available plus the majority of the time I think I prefer not having a hood for ease of layering.


On the Rab website it claim to weigh 260g for the 2013 model.  Mine weighs in about 100g heavier though but that's for a large.  Rab call the fit regular, while the Alpine version is  slim fit.  I'm usually the smaller end of large, with medium being a little to small in the majority of technical clothing.  This jacket fits me a little looser than most Rab clothing. A medium probably would have been fitted on me.  The large I have though will comfortably fit a fleece underneath to beef up its winter protection. 


The Pertex Equilibium outer is pretty water resistant.  I've worn this is some pretty heavy rain and the DWR and Pertex has managed to keep me dry...well as dry as you can expect without a hood, but that's by no means a design flaw, just the wrong tool for the job!  To partially battle this though you can use the elasticated drawcord to tighten up the neck to keep the warm air in and rain out, same with the bottom of the jacket.  The inner is a high wicking, smooth, micro fleece drop liner. 


As you'd expect from Rab the sleeves are a little longer than average which I've found works great when scrambling or mountain biking and you can adjust how tight you want them with the velcro adjustment.  With the velcro undone I've found theirs enough stretch in the elastic to slide the sleeves up past your elbows without feeling overly tight.


To keep the item simple and cut excess weight there's only 2 hand pockets at the bottom of the jacket.  I kind of like this. They aren't high to be "harness compatible" yet I've found them perfectly fine using a hip belt on a backpack and see no reason for them not to work fine with a harness.  The pockets are pretty deep and will pass the standard OS map test no problem!  The pockets are lined with the same fleece liner as the jacket but in a mesh form to give a little extra venting.  One really smart, well thought out feature I like about the pockets is that the bottom inch of them are smooth pertex which will stop crud and keys poke through the mesh and cause extra wear.  I've found on pockets with mesh all the way to the bottom that small twigs and dirt work their way through the holes into the liner and become really fiddly to work out. This goes some way to combating this and in use I've found it actually works!  The pocket zippers have nice little Rab detailed zip pulls.  The devil's in the detail and corner certainly haven't been cut.  I've found the jacket folds really easily into one of the pockets but their isn't an internal pocket zipper tag to seal the pocket from the inside, doubling it into a stuff sac.


The main zip is a sturdy 2 way YKK affair, backed with a storm flap and small fleece lined beard guard (same liner as the jacket itself).  The collar itself isn't that high, but then again this isn't really a full on winter jacket.


In use I've found it incredibly breathable and I've never felt damp or clammy in it.  Definitely a softshell to look at if you want one for very active use, like mountain biking or winter fell running.  I've been using it as my active outer layer when dry over the winter.  I get pretty hot when working hard and this has been perfect for me.  For example, today I used it scrambling with a merino wool t-shirt under in about 1-4C and didn't feel cold or overheat, but soon start to cool down when inactive. When below zero a thicker baselayer or thin fleece underneath works really well, especially if using a really high wicking base to keep up with the super breathable outer.  Of course this has its drawbacks, if you want more moisture to escape than other softshell's you'll have to sacrifice a little windproofing.  In all but the strongest winds you'll never notice that it's wind resistant rather than proof, even than the difference will be marginal.  As well as using as an outer I've work it under a shell in cold, rainy conditions and for that use it's been spot on too.


Overall I'd say this is the best softshell I've ever had the chance to use.  For me it's been the perfect 3 season softshell (I'd go for the VR guide or normal VR for proper winter conditions) and super adaptable.  Works great as a replacement for a light fleece and windproof combo.  It's great for mild winter active use all the way upto a light, warm layer in the summer.   It isn't the cheapest but after a decent amount of use and a couple of washes it looks like new still and I can't see it not lasting quite a long time.  Improvement wise I think a zip to allow the pocket to double as a stuff sack and a very slightly taller collar (I'm talking like 10mm here) would make this even better, but that's just being overly fussy. All I need to do now is get the Alpine version to complete the set and add a little extra protection from the elements!  Plus it looks cool enough to wear about town (It is a little too nice for just hill use). 


Photos coming soon!


Wednesday 2 January 2013

A very wet slog from Lady Clough to Kinder Edge

On Friday last week I'd decided to get my rear end out over the hills, come rain or shine.  While I've not been slacking over the Christmas period, with plenty of gym sessions, I've generally been stuck inside.  When that happens productivity slows to a halt, housework gets abandoned and I find myself being drawn to the Xbox, then nothing really, really gets done!

So, a few texts to some of my weekend warrior buddies (who don't usually mind getting wet) and I'd managed to get Adrian (a PTI who's easily persuaded into most things that sound like hard work) and Adam (who's currently away prepping for Afghanistan with the regular counterpart of our regiment, the Duke of Lancs), who I'd not seen for a while and is just as keen on less than favourable conditions.

Since I'm based in Glossop I tend to find I approach Kinder from the North, on the Pennine Way, after heading up Doctors Gate, or parking on the Snake Pass summit.  After looking at the map and being short on time for the day, I wanted to get up onto the Edge on Kinder's Northern side as quick as possible.  Firstly because the crowds usually head along the Pennine Way and secondly we didn't really have more than 4 hours of daylight at our disposal.  Fair to say, because of the weather we saw 1 other group from a distance the whole afternoon.  I settled on setting off through Lady Clough with the intention of heading up the Fairbrook path after crossing one of the many fords, then ending up on the Edge, via Fairbrook Naze.  Once here I intended to head along the Edge to the Pennine Way, down the steep steps, then along the bottom of Ashop Clough to get to Lady Clough again where I'd parked.

On the day the weather was meant to be horrendously wet in the morning and dry and (gasp) sunny in the afternoon.  Plans generally fall apart on first contact and this is pretty much what happened.  We crossed through Lady Clough forest to where one of the many fords were, to take us over and allow us to carry on with the route.  Needless to say the river was a LOT more swollen than expected.  What usually is about 6 inches deep and I feel perfectly happy to let my dog run about in with zero chance of being swept away, was a raging torrent about 2 foot deep.  Not feeling like getting wet and/or washed a mile downstream we decided to do the route in reverse and see how the river looked upstream once a few of the tributaries were out the way.  Knowing there's a footbridge near the Snake Inn this seemed logical, rather than do it the other way round and find we're stuck out longer than expected. 


We headed upstream following the Ashop Clough footpath.  Once out of the forest the rain picked up a notch so on the the waterproof pants.  I'd picked up a pair of Berghaus Goretex gaiters and Berghaus Deluge waterproof pants a week earlier and this seemed a perfect chance to give them some proper use.  I'd stuck the gaiters on as soon as we set off earlier as I knew it'd be a boggy day, and the pants went on less than a mile later.  Both performed really well and for the £65 I paid for both I can happily say they're brilliant value for money.  For the £40 I paid for the pants they blow everything else out the water in that price bracket.  Unless your going to spent £100 on something really high end I'd be more than happy with these.  Up top I was using what I think is a prototype Rab Pulse jacket.  I picked it up from the Rab factory shop for peanuts a while back and its made from Pertex Shield+.  It looks the same as the Pulse but has a second chest pocket and weighs 230grammes and has no labels inside. Stupidly light but stood up to the rain well.  I'll write more about the gear used in proper reviews at a later date once I've used it all more.


After about 2 miles the river was narrow enough to jump over, but must have still been nearly 2 foot deep.  I looked on cautiously thinking how Jess would do crossing, to turn around and see her floating downstream backwards with a look of "check out what I can do, Dad"! Thankfully she's a very strong swimmer and quite large (being a 6 stone German Shepherd) and I'd kept her on her extendable lead, for exactly this reason seeing as there were no sheep about for her to be tempted with.  Within about 15 feet she'd perfectly happily hopped back out again without the need for me to go diving in after her and somehow with a dry head on her behalf.  Needless to say I kept her lead shorter after that until we crossed a couple hundred metres upstream where we could jump easily as I swear she was a duck in a past life. She seems drawn to jump into any water she sees!  We'd made the decision to cross earlier than the Pennine Way (where the river hasn't even started) as thick fog was heading towards us from the West and progress had been slow.  Ideally I'd wanted to get up onto the top of Kinder as soon as possible but this idea had gone a little backwards. 

Once we'd successfully crossed and were all still relatively dry (apart from me who'd gone knee deep into a bog which is traditional for me every time I go out) we just made a straight line up to the Edge, following what looked like the least steep part of the hillside.  It was a knackering 500 metres but cut out at least an hour of much needed daylight and meant we were just ahead of the incoming fog. 


As we headed East along the Edge light was starting to fade so we upped the speed a gear to try get back down to the road before it gets totally black, but I noticed quite a few potential overnighter spots.  If you do, remember that your not allowed to in the Peak District, so exercise common sense. Leave no trace and arrive late/leave early.  After a wet a slippery descent along the Fairbrook path we got back onto the Snake Pass, virtually opposite the Snake Inn.  We stuck headtorches on to make sure we didn't have any accidents with passing traffic in the dusk as I'm pretty certain we'd end up worse off!  Luckily there's a bit of a path along the side of the road so we didn't actually have to walk the road which I was pretty glad for.  20 minutes later we were back at my car, muddy and wet, but glad to have got out for sure.  I worked out we'd only walking 6 miles in 4 hours but it felt like double that!  In the dry I'm certain we'd have made twice as fast progress.  Nevertheless, it beats sitting at home getting fat over the Christmas period!

Saturday 29 December 2012

Montane Jaguar Fleece Jacket Review

I've been using the fleece for about a year now so thought it was about time I did a proper write up of it.  It was the first fleece I'd ever bought that had this many nifty features.  I think it can definitely sit in the superfleece category.  Firstly though I must apologise for the photos, since the weather has been so poor I've not been able to get out and get some decent shots of the beast in action.
 
 
This is the list of feature that Montane list on there website:
POLARTEC® Wind Pro® fabric is highly wind resistant and thermally efficient
DRYACTIV Stretch underarm body contoured side panels
Flatlocked sewn seams throughout for extra comfort and durability
Two luxurious hand-warmer pockets positioned well clear of backpack or climbing harness belt
Full length, reversed and baffled two way YKK front zip for ease of use with a backpack or climbing harness
Low bulk elasticated cuffs which pull up forearms to aid cooling
Adjustable hem to prevent heat loss
 
 
I'll cover each feature pointed out above in more detail through-out the review.
The cut is typical Montane.  Athletic, without being restricting or uncomfortable.  Far from it infact; this fleece is so comfy I have a hard time taking it off when the mercury plummets.  The Polartec Wind Pro fabric is 475gsm meaning it is about as thick as fleece gets.  To make it even warmer the inside is a high loft fabric that can only be described as fur like and is insanely warm and satisfying to chuck on.  The outside is a pretty smooth and dense fabric for a fleece giving 4 times more wind resistance than fleece.  I could be wrong with the 4 bit though, that's from memory but it certainly does make a noticeable difference unless its howling a gale.  For dry, breezy days it'll certainly hold its own without the need to stick a shell on permanently. The side panels and underarms parts are made of a Dryactiv 365gsm brushed, spandex mix fabric.  While not as warm as the high loft Wind Pro it gives superb ease of movement leaving the rest to do what its made for, insulate.
 

To keep all this warmth firmly in place there is a drawcord on the neck and bottom of the jacket which work pretty well.  Fairly low tech but like they say, 'if it ain't broke, don't fix it'.
 
 
The pockets are a feature that I think are pretty well thought out.  Both feature zips and have a mesh liner to aid ventilation while allowing warm air from your body to warm hands better.  The main body insulation is on the outer side of the fabric meaning you are putting your hands inside the warm cocoon of the fleece, not just in stitched on afterthought.
 
 
The zip is  2 way affair with a pretty smart wind baffle with 'Montane' printed along it.  To me it just looks smart, with rubber grippers all over the contact points.
 
 
A medium weighs 690g making it at the heavier end of the scale for fleece and a bit bulky to store but for me this is a small price to pay for the luxurious feel it affords.  It's not cheap either retailing at £130 but to be honest it can usually be found for a fair bit less. I managed to pick mine up for less than half that which is a bargain for what your getting.
 
 
How is it to use though? WARM to put it simply.  For active use you will boil if used for anything warmer than freezing.  If you do happen do use it and end up sweating profusely your safe in the knowledge it wicks stupidly fast.  Within 20 minutes of mildly hard work at -3C a couple of weeks ago the inside of my shell was drenched while the inside of the fleece was bone dry.  Until this point I don't think I realised quite how breathable it actually was!  For layering under a decent down jacket I don't think you'd need anything any warmer south of the arctic circle, or at least in this country anyway!  On top of the uses outside, since it has such a luxury feeling I've found it to be my guilty pleasure jacket for wearing about the house when its cold, you know, being the hardened outdoorsy type I am!  Whatever you use it for though, it'll certainly do its job well.
 
 
In a nutshell, buy it if you want one of the warmest, luxurious feeling, premium quality fleece jackets going with features galore at a fair but not cheap price.

Thursday 29 November 2012

Some of my favourite photos of 2012

While I started this blog with the intention of uploading trip reports and photos from that point onwards I've decided I'd like to share some of my favourite images from 2012.  All of these were took on my Iphone 4 and I've continuously been suprised by how good the camera is on this thing!  All the photos are my own and have had the instagram treatment. Yeah, I know the effects are like Marmite to most, but I think for a camera on a phone they look alright.  Naturally, they won't come close to my dslr but for snapshots they do the trick!

And on with the show!


This first shot is from January on Bleaklow, took about half a mile East of the Pennine Way looking towards Lady Clough and Kinder Scout.


These next two were took in February.  Amazingly we were in the middle of a heat wave and the temperature must have been around 20C at least. I was in short and a T-shirt and got sun burnt!  Both are from the East, on the Pennine Way while heading towards Kinder Downfall on the hunt for Dean Read's geochocing cache (which I successfully found).


This was taken on Shelf Moor, Bleaklow, Looking roughly South towards the Snake Pass.  I replaced Dean's cache up here to continue the game a couple of weeks after finding it originally.  This is one of my favourite places in the Peak District and is only a couple of hundred metres from the Overexposed plane wreckage which I wrote about in my Halloween Ghost Hunting post.


These next two were took in the summer from the top and about a quarter down Doctor's Gate.  Doctor's Gate is a bridleway and a notorious Mountain Biking descent...it's awesome, if a little painful at times.  Originally the track was a Roman road, commonly travelled by a Doctor, hence the name.  Both the photos were took the same day on my new (at the time) bikes maiden voyage.  It's a Vitus Escarpe 2 and for the money it's a right little monster (super slack, 140mm).


This was taken in Lady Clough Forest, early Autumn.  For those who've never visited it's a really surreal place and somewhere I've often gone for a leisurely stroll with the dog and other half.


Finally, the most recent, taken around September, October time.  It's from the top of Shire Hill, on the outskirts of Glossop.  This is virtually my back garden since it's a 5 minute walk to the base of the hill from my house.  I love the effect the dew made on all the spiderwebs.


That's all for now, but expect plenty of new photos in the future!

Thursday 22 November 2012

Rab Boreas pull-on review (Womens version - Aurora)

The Rab Boreas (or Aurora if your female) is a curious beast indeed. Without sounding too pessimistic to start with it isn't waterproof, water resistant, insulated or even warm like a fleece or any other midlayer. It's not a fast wicking baselayer.  Heck, it's not even windproof, simply wind resistant!

Does this mean it's none of these or has even got a real purpose? Well think of it this way; it fills the gap between every single one of these.  A big claim for such an odd item of clothing but let me explain.  I've seen the Boreas labelled as a 'summer weight softshell' which it is, but it's so much more!

The actual product description on Rab's website is pretty vague for starters, saying how its simply a lightweight, stretch pull on offering protection in the mountains and how its won editors choice awards.


Let me help fill in the blanks and help make some sense of this thing.

First of all it isn't waterproof or resistant at all, nor does it claim or try to be. It doesn't even have a DWR coating, but really there's nothing stopping you proofing it yourself, which I must admit I'm kind of tempted to try myself with some Nikwax Softshell proofer.

It's not windproof, but wind resistant. The idea being that you get maximum breathability while removing the majority of wind chill.  It's an idea that is being seen more often these days, but mainly because it works! It's perfect for when your working hard and coupled with a decent base layer you have a formidable combo for hard graft.  Because of this I've found myself using it for running in, instead of using a pertex wind shirt. It's quieter and argueably more breathable and in my eyes comfier. The fit is typical Rab, with long arms, perfect for climbing and mountain biking when it's a little chilly for just your base layer but too warm to put a shell on.

The Boreas hasn't got a fleecy inner like most softshell jackets but is rated 50 for UV. Everyone has been caught out and got sunburnt when it's been breezy but too warm for a hardshell or a regular softshell.  This is where the Boreas comes in to save the day.  You have lightweight sun protection without feeling like a boil in the bag meal. Because of it's lack of insulation I've found myself using it on those days when you cant decide to use a lighter or heavier weight base layer.  Coupled with a light base layer it feels cooler than wearing a lightweight fleece, especially when used as a midlayer , under a shell.  Perfect for those inbetween days when you're cold in just a shell, but boil when you even stick a thin fleece on.

Or you can even try it the other way around, layering over a light fleece for when you want maximum breath ability in cold conditions. Plus I reckon it just looks cool and I've found myself using this combo when out walking the dog.


Feature wise the Boreas is pretty basic, sporting a chest zip for venting and a single chest pocket.  I couldn't quite fit my large one into the chest pocket but that may have been me being useless as it was pretty close.  The usual neat finished touches as you'd expect from Rab are there, like neat little zipper garages and flat seams.  Everything just looks tidy.

The hood is made to fit under a helmet. I haven't used it in this capacity but I have worn it under a shell hood comfortably and it followed my heads movement with no problems.


The price for the Boreas is bonkers. It retails at a measly £45. That's base layer pricing, not softshell territory!  In my opinion it's a massive bargain and I'm struggling to not buy one of every colour!  At 300grammes too you'll hardly notice it in your pack.  I've found myself using it all the time.  It's one of those items that works with every bit of clothing you own and will make it just that little bit more useful.  Be it a little more warmth, wind resistance, sun protection, breathability, this top will fit the bill.  Think of all the times when you can't make your mind up what to wear and I guarantee the Boreas will be the answer! Just buy one, you can't afford not to have this future classic in your wardrobe!

Monday 19 November 2012

Snugpak Softie 6 Kestrel sleeping bag review

I've been using the Snugpak Softie 6 Kestrel bag, or the Softie 6 as it's commonly known, for a couple of year now so it's fair to say I quite literally know it inside out.

It's made from a material called Paratex which to all extents and purposes is pretty similar in feel to most pertex bags.  It's certainly tough and I've been pretty rough with this bag for quite a while and it still looks like new.  Inside it has Snugpaks Softie Premier insulation.  The key selling points are its weight to warmth ratio which from experience I can say rates as some of the best synthetic insulation available.  The Softie 6 weighs 1200g including stuff sack and packs down deceiving small.  Compared to many synthetic bags, this crushes down to virtually nothing, almost encroaching on down compressibility territory!  It isn't a super narrow bag either; it's a generous cut so suitable for the bigger fellow or for sleepers who hate feeling restricted like myself. The tapered mummy shape is a fair size towards to bottom and I've never felt restricted in the bag, plus the reinforced foot liner means you can sleep with your boots on!  Granted for the general public this feature isn't needed but for military users it's invaluable, especially on exercises when you know your going to be jumping out of this thing in a hurry.  Speaking of which, the zip is a big, chunky, solid thing.  Easy to use with gloves on and I've never had it snag on me.


We've covered that it's a great shape and easy to carry but can it do the business?  Snugpak rate this as a 2 season bag, with a lower comfort rating of 0C and an extreme rating of -5C.  Pretty generous for a 2 season bag but I can certainly vouch for it.  In my experience it's warmer than your average 2 season bag and I'd personally use it as a 3 season.  It's been my automatic 'go to' bag for anything from sleeping indoors, right up to borderline freezing temperatures.  Undo the zip and it's comfortable indoors throughout the year, plus the fast wicking paratex inner leaves you feeling dry when it is warmer.  At the other end of the spectrum I've slept around freezing with this bag in nothing more than a bivvy bag and wearing midweight upper and lower baselayers, even feeling a little warm, but with a freezing face!  If your going to be using this bag at the colder end of the spectrum there's no reason a down jacket wont keep you snug well into negative numbers but I'd only recommend this option for experienced users.


The bag is a little short on fancy features but what it does, it does spot on.  For example, there is no neck baffle (but Snugpaks Elite range has) and the only adjustability other than the zip is the hood drawstring, but what more do you need for day to day use? There are hanging tags at the bottom to air the bag between uses and a really tough stuffsack that crushes the bag down to the point where you look at it thinking "is this thing going to be warm enough?".  To prevent cold spots the zip has a full length baffle to keep in precious warmth and prevent snagging.


For the money I think this bag offers superb value for money selling for just under the £80 mark and available in olive green, desert colour or black for less tactical use.  Usually they can be found a little cheaper too from many suppliers and I think I paid around £60 for mine.  Would I buy it again? Absolutely.  It offers a huge useable temperature range and I'd highly recommend it for just over freezing, up to just under heatwave levels of heat depending how you sleep.  If your a very cold sleeper you may want to move up a notch to the Softie 9 but for true UK damp 3 season use the 6 is a real workhorse.